Alright folks, let’s talk Halloween baking! As a mom of two little kitchen helpers and a chef with over 17 years of experience whipping up deliciousness, I know a thing or two about making holidays special without all the fuss. My philosophy has always been that everyday food, and especially holiday treats, should be exciting and taste amazing. That’s where these spooky spider cookies come in! They are the perfect blend of easy, festive, and fun, making them an absolute hit at any Halloween party or just for a sweet afternoon treat. We’re all about real food, made simple, and this recipe is a shining example right from our family to yours.
Why You’ll Love These Spooky Spider Cookies
Trust me, these spooktacular treats are going to be a massive hit! Here’s why:
- Super Easy to Make: Even with little sous-chefs helping, anyone can whip these up. They’re perfect for busy parents!
- Seriously Fun to Decorate: The decorating part is the best! Your kids will love turning these simple cookies into creepy-crawly spiders.
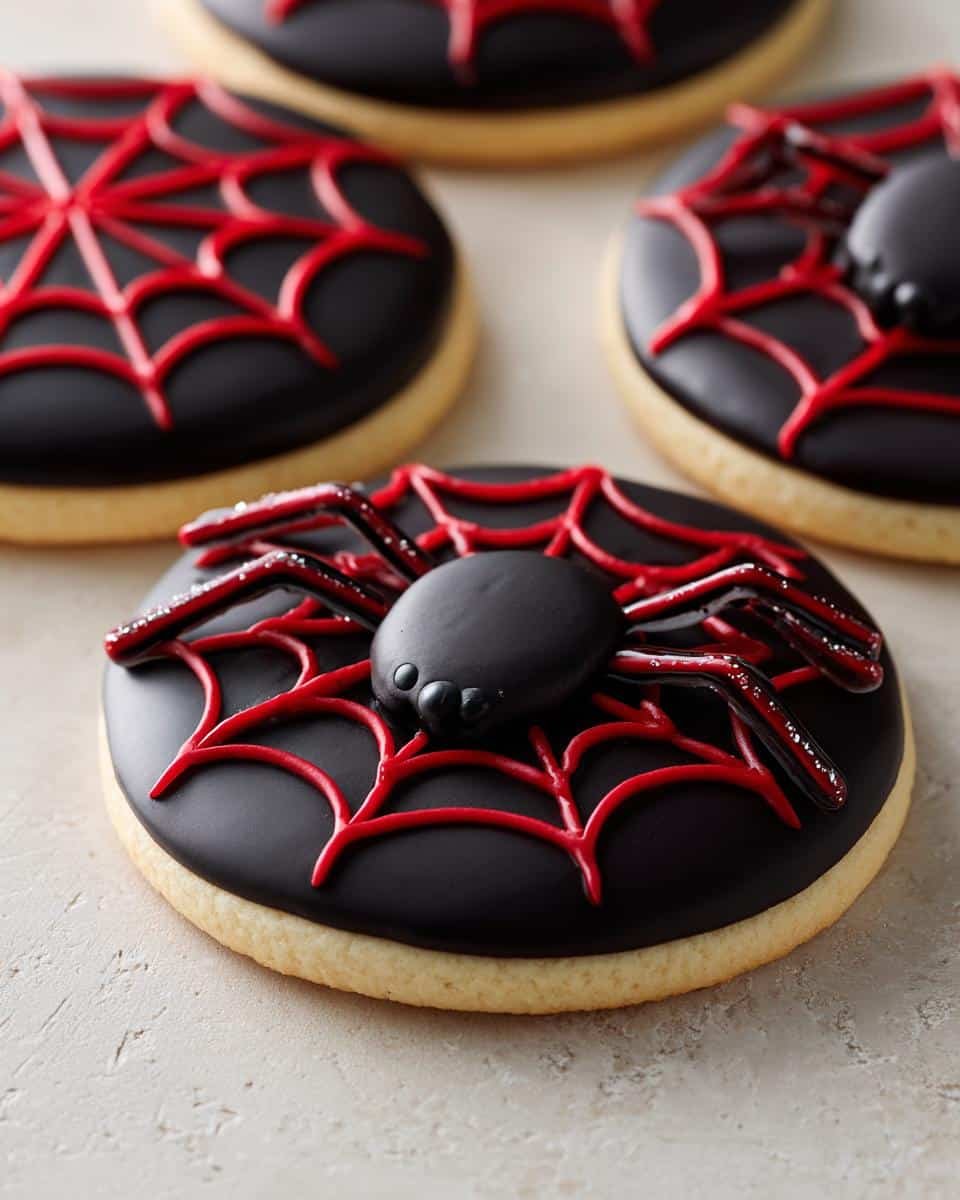
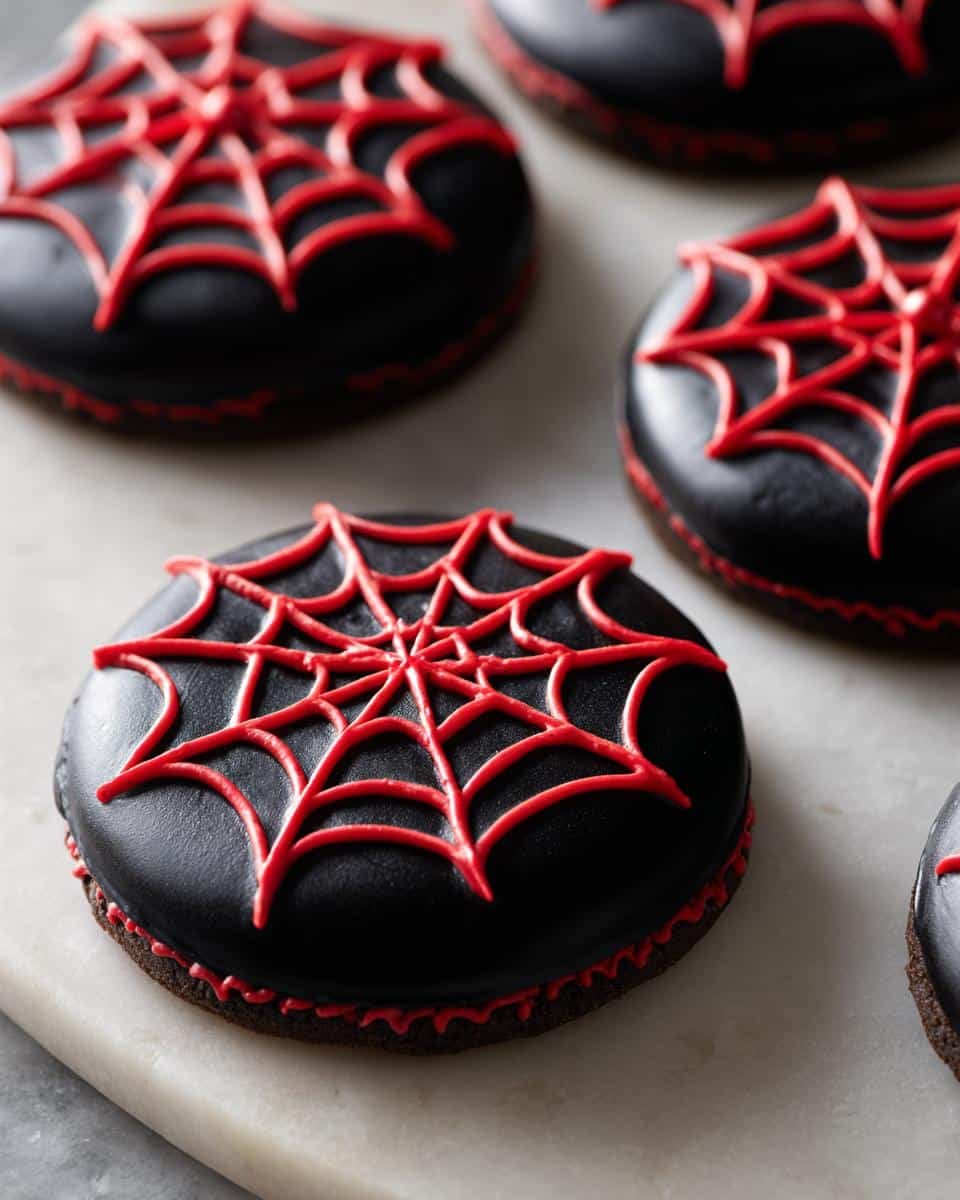
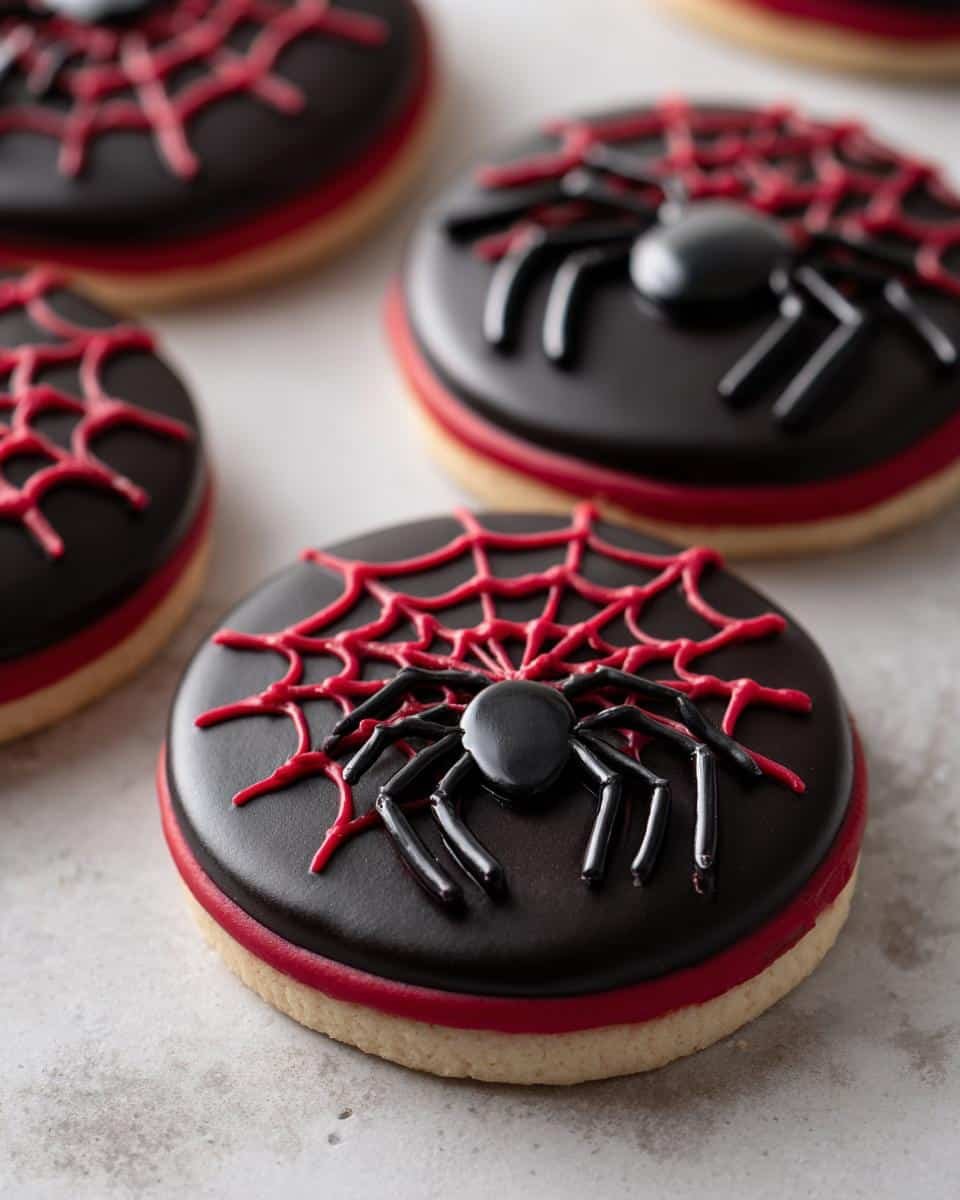
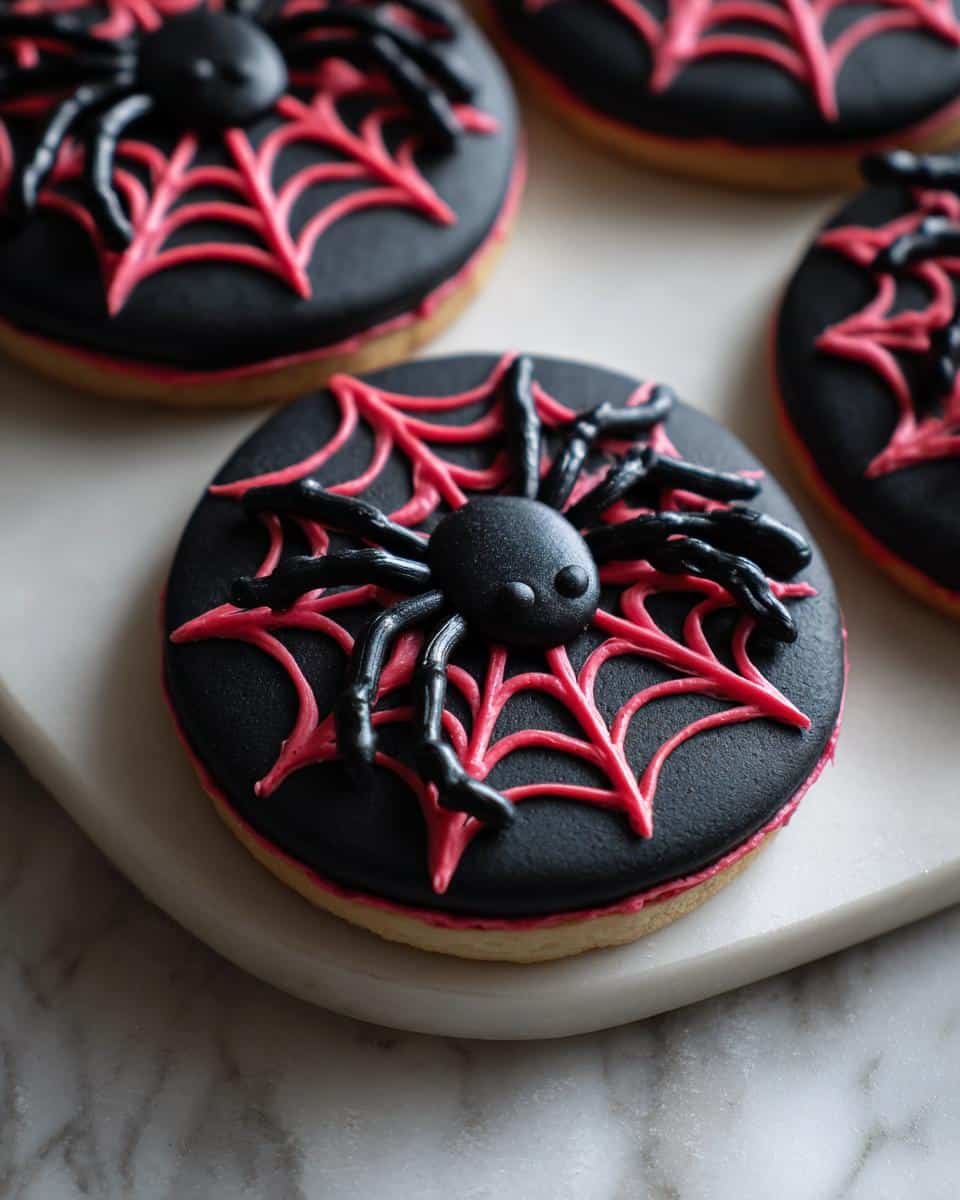
- Visually Stunning: They just look so darn festive! The black frosting and spiderweb design are perfectly spooky for Halloween.
- Crowd-Pleasers: Whether it’s a Halloween bash or just a little holiday treat, these cookies disappear fast. They’re always a welcome addition to any holiday spread.
Gather Your Ingredients for Spooky Spider Cookies
Alright, let’s get our spooky party started! To make these amazing spooky spider cookies, you’ll need a few things from your pantry. First up, we need a cup of unsalted butter that’s been sitting out for a bit, nice and softened. Then, grab a cup of granulated sugar to make them nice and sweet. We’ll also need one big egg and a teaspoon of vanilla extract for that classic cookie flavor. For the dry stuff, get 2 and a half cups of all-purpose flour, a teaspoon of baking soda to help them rise just right, and half a teaspoon of salt to balance everything out. For the spider part, you’ll want about half a cup of black frosting – if you can find a good dairy-free one, that’s great too! We’ll also melt about a quarter cup of red candy melts for those cool webby designs. And the final touch for those creepy legs? Half a cup of black licorice laces, cut in half – about 24 pieces total.
Essential Equipment for Making Spooky Spider Cookies
Okay, before we dive into the fun, let’s make sure you’ve got everything ready to go! For these spooky spider cookies, you won’t need anything too fancy. Just grab a couple of baking sheets to get those cookies baked up efficiently. A good wire rack is super important for letting them cool completely – you don’t want warm cookies getting frosted, trust me! You’ll also want a sturdy mixing bowl and maybe an electric mixer if you have one, though a good whisk and some elbow grease work too. And for the super-detailed spiderweb art? A simple toothpick works like a charm!
Step-by-Step Guide to Perfect Spooky Spider Cookies
Alright, let’s get these amazing spooky spider cookies from our kitchen to yours! It’s actually pretty straightforward, and honestly, the fun part is the decorating. Follow these steps and you’ll have a batch of spooky goodness in no time.
Preparing the Cookie Dough
First things first, let’s get that cookie dough ready. In a big mixing bowl—or your stand mixer bowl if you’re feeling fancy—cream together that softened butter and sugar until it’s nice and fluffy, almost like a yellow cloud. This step is key for a tender cookie, so give it a good minute or two! Then, beat in your egg and that lovely vanilla extract until it’s all combined. Now, in a separate little bowl, give your flour, baking soda, and salt a quick whisk together. Gradually add this dry mix to your wet ingredients, mixing just until everything comes together. Seriously, don’t overmix here—we want tender cookies, not tough ones! Once it’s just combined, wrap that dough up and pop it in the fridge for about 30 minutes. This chilling step makes it SO much easier to handle when you roll the balls later.
Baking Your Spooky Spider Cookies
Once your dough has had a little chill session, it’s time to bake! Preheat your oven to 350°F (that’s 175°C). Line a couple of baking sheets with parchment paper or a silicone mat—it makes cleanup a breeze! Now, scoop out about one-inch balls of the chilled dough. Roll them between your hands until they’re nice and smooth, then place them on your prepared baking sheets, leaving a little space between them. Bake these little guys for about 10 to 12 minutes. You’re looking for the edges to just start turning lightly golden. They’ll still look a bit soft in the middle, and that’s okay! Let them cool on the baking sheet for a few minutes before carefully transferring them to a wire rack to cool down completely. And I mean *completely*—frosting warm cookies is a sticky disaster waiting to happen!
Decorating the Spooky Spider Cookies
This is where the magic happens and our cookies get their spooky charm! Once your cookies are totally cool—and I can’t stress that enough—it’s time for the fun part. Spread a generous layer of that black frosting all over the top of each cookie. Don’t worry if it’s not perfectly smooth; a little texture adds character! Now, for the spiderwebs. Melt your red candy melts according to the package directions. You can do this in the microwave in short bursts, stirring between each, or use a double boiler. Once melted and smooth, pour a little bit into a small piping bag or a plastic bag with a tiny corner snipped off, or just use a toothpick. Starting from the center of the cookie, draw a spiral outwards. Then, use your toothpick to drag lines from the center out to the edge, creating that classic spiderweb effect. It looks super professional but is surprisingly simple.
Finally, take your cut licorice laces and gently press two halves into the sides of each cookie to look like spider legs. Ta-da! Perfectly spooky and totally delicious.

Tips for Spooky Spider Cookie Success
You know, even with a recipe that’s already super easy, a few pro tips can make these spooky spider cookies even better! First off, make sure your butter is truly softened but not melted when you start creaming it with the sugar. This makes a world of difference in the cookie’s texture. When you’re chilling the dough, don’t skip it! Cold dough is way less sticky and holds its shape beautifully when you bake them. My husband always jokes I could win an award for “most patient dough chiller.” For the frosting, if it feels a little too thick for spreading, just stir in a tiny splash of milk, like a tablespoon, until it’s nice and smooth. And for those spiderwebs? Don’t stress about perfection! A little wobble makes them look more homemade and charming. Honestly, the kids love helping with this part!
Ingredient Notes and Substitutions
So, about these ingredients for our spooky spider cookies – I like to keep things simple, but sometimes you need a little flexibility! The softened butter and granulated sugar are pretty standard for any good cookie base, creating that lovely tender texture we want. Now, about those black licorice laces for the spider legs – they’re super fun, but if you can’t find them or they’re not your family’s favorite, don’t sweat it! You can totally use black string candy, or even just pipe thin lines of black frosting directly onto the cookie to make the legs. It gives a slightly different look, but it’s just as creepy and delicious. Also, if you happen to have a dairy-free household, there are some fantastic dairy-free black frostings and candy melts out there nowadays. Experiment and have fun with it!
Serving and Storing Your Spooky Spider Cookies
These spooky spider cookies are perfect for serving right after they’re decorated, but they actually taste even better the next day once the flavors have really melded together! To keep them looking their spooky best and tasting delicious, store any leftovers in an airtight container at room temperature. I usually find they stay wonderfully fresh for about 3 to 4 days, which is great if you need to make them a little ahead for a party.
Just be sure they’re completely cool before you pack them away, and try not to stack too many on top of each other, especially if your frosting is still a little soft, so those spiderwebs don’t get smushed! Honestly, they rarely last that long at our house!
Frequently Asked Questions about Spooky Spider Cookies
Got questions about these creepy-crawly critters? I’m happy to help! It’s all about making your baking life easier and tastier.
Can I make these cookies ahead of time?
Oh yes, absolutely! Making these spooky spider cookies ahead of time is a great idea, especially if you’re hosting a party. You can bake the cookies and store them in an airtight container for 2-3 days before you plan to decorate them. The frosting and decorations hold up really well for about a day or two after you put them on, so you can decorate them the day before your event. They’re perfect for planning!
What’s the best way to store decorated cookies?
For these fun spooky spider cookies, storing them is pretty simple. Once they’re completely decorated and the frosting is set, pop them into an airtight container. You can stack them, but I like to use parchment paper between layers just to be safe, especially if it’s warm out and the frosting might be a *tiny* bit soft. Keep them at room temperature, and they’ll stay fresh and delicious for about 3-4 days. Honestly though, they’re usually gobbled up way before then!
Can I use a different type of frosting for the spiderwebs?
You sure can! While I love the easy spread of black frosting and the detail you can get with melted candy melts for the webs, feel free to get creative. You could use a simple buttercream frosting tinted black as your base. For the web outlines, you could also use royal icing in black or even a contrasting color if you want a different spooky vibe. Just make sure whatever frosting you use is completely set before adding the licorice legs!
Are these suitable for Christmas cookies too?
While these spooky spider cookies are definitely Halloween stars, you can totally adapt them for other holidays or just for fun! Think of them as a versatile decorated cookie. You could swap the black frosting and red candy melts for green and yellow to make “monster cookies,” or even use white frosting and blue candy melts for a wintery, icy look. They even work with different cookie bases. The decorating is where you can really have some fun, so don’t be afraid to play around!
Estimated Nutritional Information
Just a little heads-up, folks! These numbers for our spooky spider cookies are estimates that are based on the ingredients I use and standard measurements. Things like the specific brand of frosting or candy melts you choose can make them vary a bit. But generally, you’re looking at around 180 calories per cookie, with about 9 grams of fat. It’s a delicious treat, and sometimes you just have to enjoy it!
Print
Spooky Spider Cookies
- Total Time: 32 min
- Yield: 24 cookies 1x
- Diet: Vegetarian
Description
Easy and festive spider cookies perfect for Halloween parties and holiday treats.
Ingredients
- 1 cup unsalted butter, softened
- 1 cup granulated sugar
- 1 large egg
- 1 teaspoon vanilla extract
- 2 1/2 cups all-purpose flour
- 1 teaspoon baking soda
- 1/2 teaspoon salt
- 1/2 cup black frosting
- 1/4 cup red candy melts
- 24 black licorice laces, cut in half
Instructions
- Cream together butter and sugar until light and fluffy.
- Beat in egg and vanilla extract.
- In a separate bowl, whisk together flour, baking soda, and salt.
- Gradually add dry ingredients to wet ingredients, mixing until just combined.
- Chill dough for 30 minutes.
- Preheat oven to 350°F (175°C).
- Roll dough into 1-inch balls and place on a baking sheet.
- Bake for 10-12 minutes, or until edges are lightly golden.
- Let cookies cool completely on a wire rack.
- Spread black frosting over each cookie.
- Melt red candy melts according to package directions.
- Use a toothpick to draw a spiderweb design on each cookie with the melted candy melts.
- Arrange two licorice halves on each cookie to resemble spider legs.
Notes
- For a smoother frosting, you can add a tablespoon of milk to the black frosting.
- If you don’t have black licorice laces, you can use black string candy or pipe thin lines of black frosting for the legs.
- Decorate cookies within a day or two of baking for best results.
- Prep Time: 20 min
- Cook Time: 12 min
- Category: Desserts
- Method: Baking
- Cuisine: American
Nutrition
- Serving Size: 1 cookie
- Calories: 180
- Sugar: 15g
- Sodium: 80mg
- Fat: 9g
- Saturated Fat: 5g
- Unsaturated Fat: 4g
- Trans Fat: 0g
- Carbohydrates: 23g
- Fiber: 1g
- Protein: 2g
- Cholesterol: 25mg


